 |
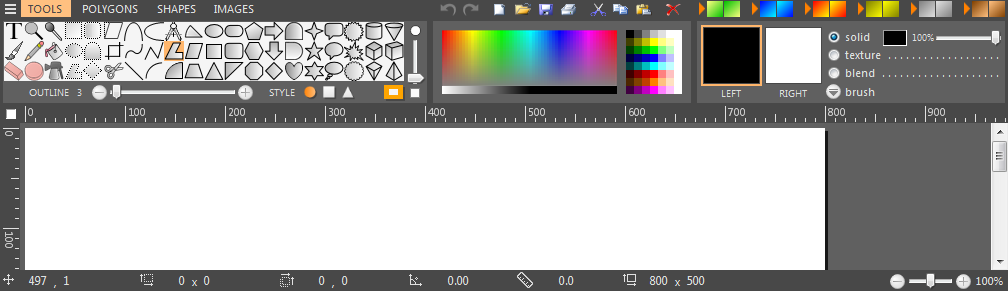
Tools
As mentioned earlier, EZ Paint has 60 interactive tools to make designing graphic illustrations
easier. There are 7 tools for drawing lines, poly-connected lines, curves, arcs, arches and semicircles.
There are 35 tools for drawing filled shapes with outlines. With these shapes you have complete control over
outline thickness (1 - 50 pixels) as well as the brush type (solid, texture, and blend)
and color to fill the shape. Both outline and fill can be turned on and off to accommodate your needs.
EZ paint also has a tool for freehand paintbrush that can be set to the 3 different types mentioned above with
any of 100 different widths. An adjustable eraser lets you erase various sections of your picture with ease.
A paint bucket lets you fill with any of the three brush types along with the ability to control the accuracy
of the fill. Color pick lets you grab any color by using left and right mouse buttons and attach them to the
appropriate brush. The Text tool lets you place text at any size up to 200 points on the screen
using any of the 3 different brush types. The program also features 7 different types of selection tools including:
Rectangle, Rounded Rectangle, Ellipse, Polygon, Archway, Diamond, and a pair of scissors for cutting out any shape.
A Crop tool lets you crop any selected image from any side. Skew lets you distort for various effects. Magnify
gives you eight levels of magnification for detailed work by left clicking (zoom in) and right clicking
(zoom out) on a centralized pixel.
|
|
Features
|
- 60 Interactive Tools
- 112 Textures
- 35 Shapes with Outline
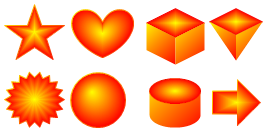
- Six 3d Shapes
- Six Tools For Lines and Curves
- Mirror Shapes and Curves
- Three Brush Types
- Radial Fill
- Freehand Brush and Eraser
- Seven Selection Tools
- Crop and Skew Tools
- Curve Slider Bar
- Rotate 360 Degrees by Variable Step
- Smoothing with Antialaising Effects
- Text With Outline/Shadow Effects
- Trail Shapes and Images
|
|
|
|
|
|
Brush Types
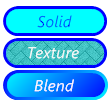
As mentioned above, EZ paint gives you three different brush types,
Solid, Texture and Blend. Solid is just a solid color no frills brush that can be set to
any color. Texture is a selected pattern that can be set to varying
sizes with a selected colored background giving you a number
of combinations. Blend is a gradient style brush transitioning the blend of two colors at
an angle which can be set by clicking the mouse
button in the brush area while it's selected.
|
|
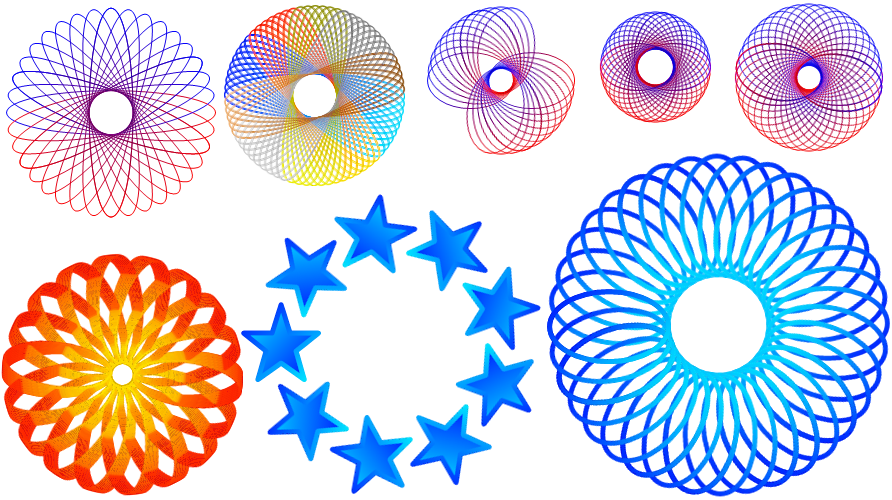
Rotation
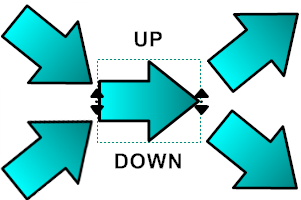
You can rotate any object by placing the mouse cursor along the left or right edge
until the down and up arrow appears. Then by holding down the mouse button and moving it up and down
the object will rotate with the angle displayed in the status bar. Just release the button when you
have the desired angle. You can also rotate by changing the angle directly by using the right click
menu by right clicking the mouse when on the object and selecting properties. Then change the
angle by changing the number in the angle box to any number between -360 and 360 degrees.
You can also change the step value with the object controls menu. This is useful for making
spirographic effects by holding down the Shift Key and dragging the mouse.
|
|
|
|
|
Smoothing
This option is set to anti-alaising by default. If you need to turn smoothing off this can
be done via the graphics menu by selecting None under Smoothing or you can simply uncheck the smooth checkbox
at the top of the screen. This might be necessary from time to time if you're doing a lot of pixel editing
or you just don't want any pixel artifacts around the edges of your shapes and lines.
|
|
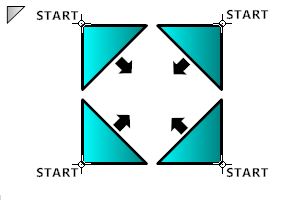
Mirroring Shapes and Curves
When you draw shapes with EZ Paint, you move the mouse to a place on the canvas and hold down either the
left or right mouse button while draging the mouse right and down. This will give you the exact shape that
is displayed in the tool button. If you want to mirror that shape then you would just drag in an opposite direction.
In other words, right and up would mirror vertically, left and down would mirror horizontally, and left and up would
mirror in both directions. You can also mirror by using the right click
menu by right clicking the mouse when on the object and selecting flip then vertical or horizontal.
|
|
|
|
|
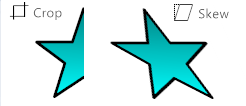
Crop and Skew
You can crop a selection by selecting the crop tool and moving the edges in with the mouse. This is reversable by either
moving the edges back out or by selecting the select tool. To Skew an image select the skew icon from
the toolbox and move the edges with the mouse. This is also reversable by using the same method as with the crop tool
|
|
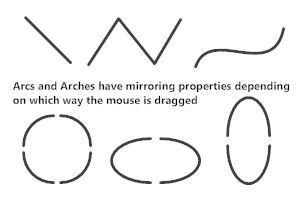
Lines, Arcs, Arches and Curves
EZ paint features six tools for drawing Lines, Arcs, Arches and Curves. One line can be drawn by using the
single line tool. If you need multiple connected lines use the polyline tool. You can draw arcs and arches by
using the Arc and Arch tools. Arcs and Arches have the same mirroring properties of shapes as mentioned above.
There is also a curve tool which works by drawing a line and grabbing a couple of points on the line to bend
or mold it into your desired shape.
|
|
|
|
|
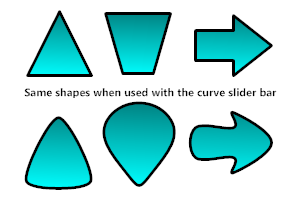
Curve Slider Bar
When you select shapes that involve just straight lines, a Curve Slider Bar will appear in the ToolBox. You can
use this slider bar to control the amount of curve added to your shape or polyline. Moving the bar up
increases the amount of curvature while moving down will decrease it. This can be a very creative tool when used
with some shapes and especially the Polyline and Polygon tools which have a lot of flexability.

|
|
Radial Fill
In addition to the normal gradient fill, EZ Paint has a radial fill. This type of fill uses a center point and
blends outward towards the edges of the shape. This is a fill only and can’t be used on lines, arcs or curves.
The center is controlled in the same fashion as the angle of the linear gradient by clicking on the brush
control when it’s selected. To use radial fill check the checkbox that appears when the blend brush is selected
|
|
|
|
|
Text with Outline and Shadow
Text with over 100 different sizes with Outline and Shadow effects. Outline has 5 levels of thickness to choose from. Shadow has two different
types available with the ability to control the position of the shadow independantly in both the x and y axis.
There's even blur for multiple light source diffusion effects.
|
|
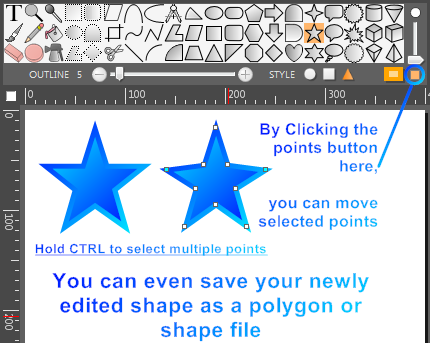
Points
Clicking the points button lets you edit the points that make up a shape. This gives you some design features
found in other object oriented programs. You can select multiple points by dragging the mouse or by holding the CTRL key.
Not only are there provisions for moving points but it's also possible to insert and
delete them. To insert a point select two or more adjacent points and hit your insert key.
Deletions are done in the same manner with the exception of the points do not have to be adjacent in this case.
You can also save the newly edited shape as a polygon file if you wish via the File menu.
Note: Not all shapes can be edited this way, but most of the straightline ones can.
|
|
|
Rotation Examples
Rotate by placing the cursor right along the left or right edge of the object until the up/down arrow cursor appears.
Then by holding down the shift key down first then the mouse button, drag the mouse up or down.
You can change the step value by using the object controls.
Object controls are located on the menu or by right clicking on the object and selecting controls.
|
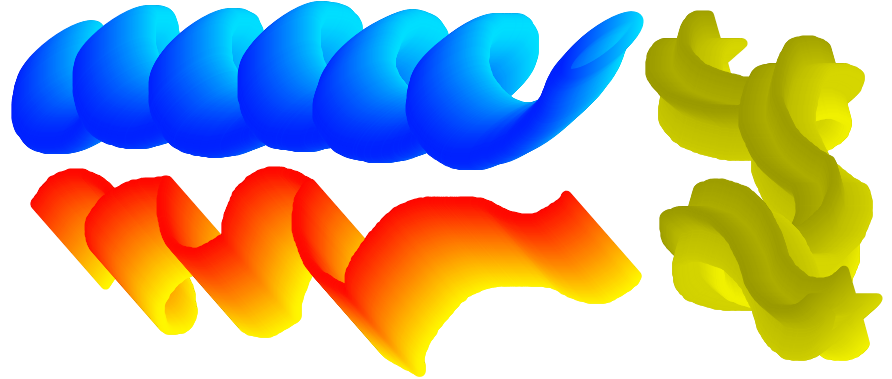
Trail Examples
Trail shapes by holding down the shift key along with the mouse button and dragging the mouse while on
the object. You don't have to hold the shift key once the mouse starts moving.
Just make sure you press the shift key prior to pressing the mouse button.
|
|
|